
Also, I've been doing a lot of alterations on thrift store clothing. Look up "thrift store clothing diy" on Pinterest and you'll see all kinds of cool ideas. Unfortunately, most of the people doing it are very thin women - it's easier to take a big something and make it small, than it is to take a small something and make it larger. There are limits. Most of my alterations so far have been limited to taking in the shoulders a little, or making the armholes larger, etc. I recently fixed a really cute brown pleated skirt that has been in my sewing basket for a LONG time....several years! I saw it at Salvation Army on the rack and thought it was adorable - but it *was* a size 20 wide, and although I'm not one of those thin girls on Pinterest, I am not a 20 wide (even after the rather unfortunate muffin incident in South Africa).
Anyway, I wanted to show you one of my refashioning projects!
I found this hanging on the wall at Goodwill. I liked it, but it was a size small, and WAY too low-cut for me. Plus, it had an elastic gathered waist, which screams "maternity top" on those of us who have had too many of the aforementioned muffin incidents.
The first thing I did was open the casing and pull the elastic out. I forgot to take a "before" shot, so this is kind of what it looked like all gathered up:
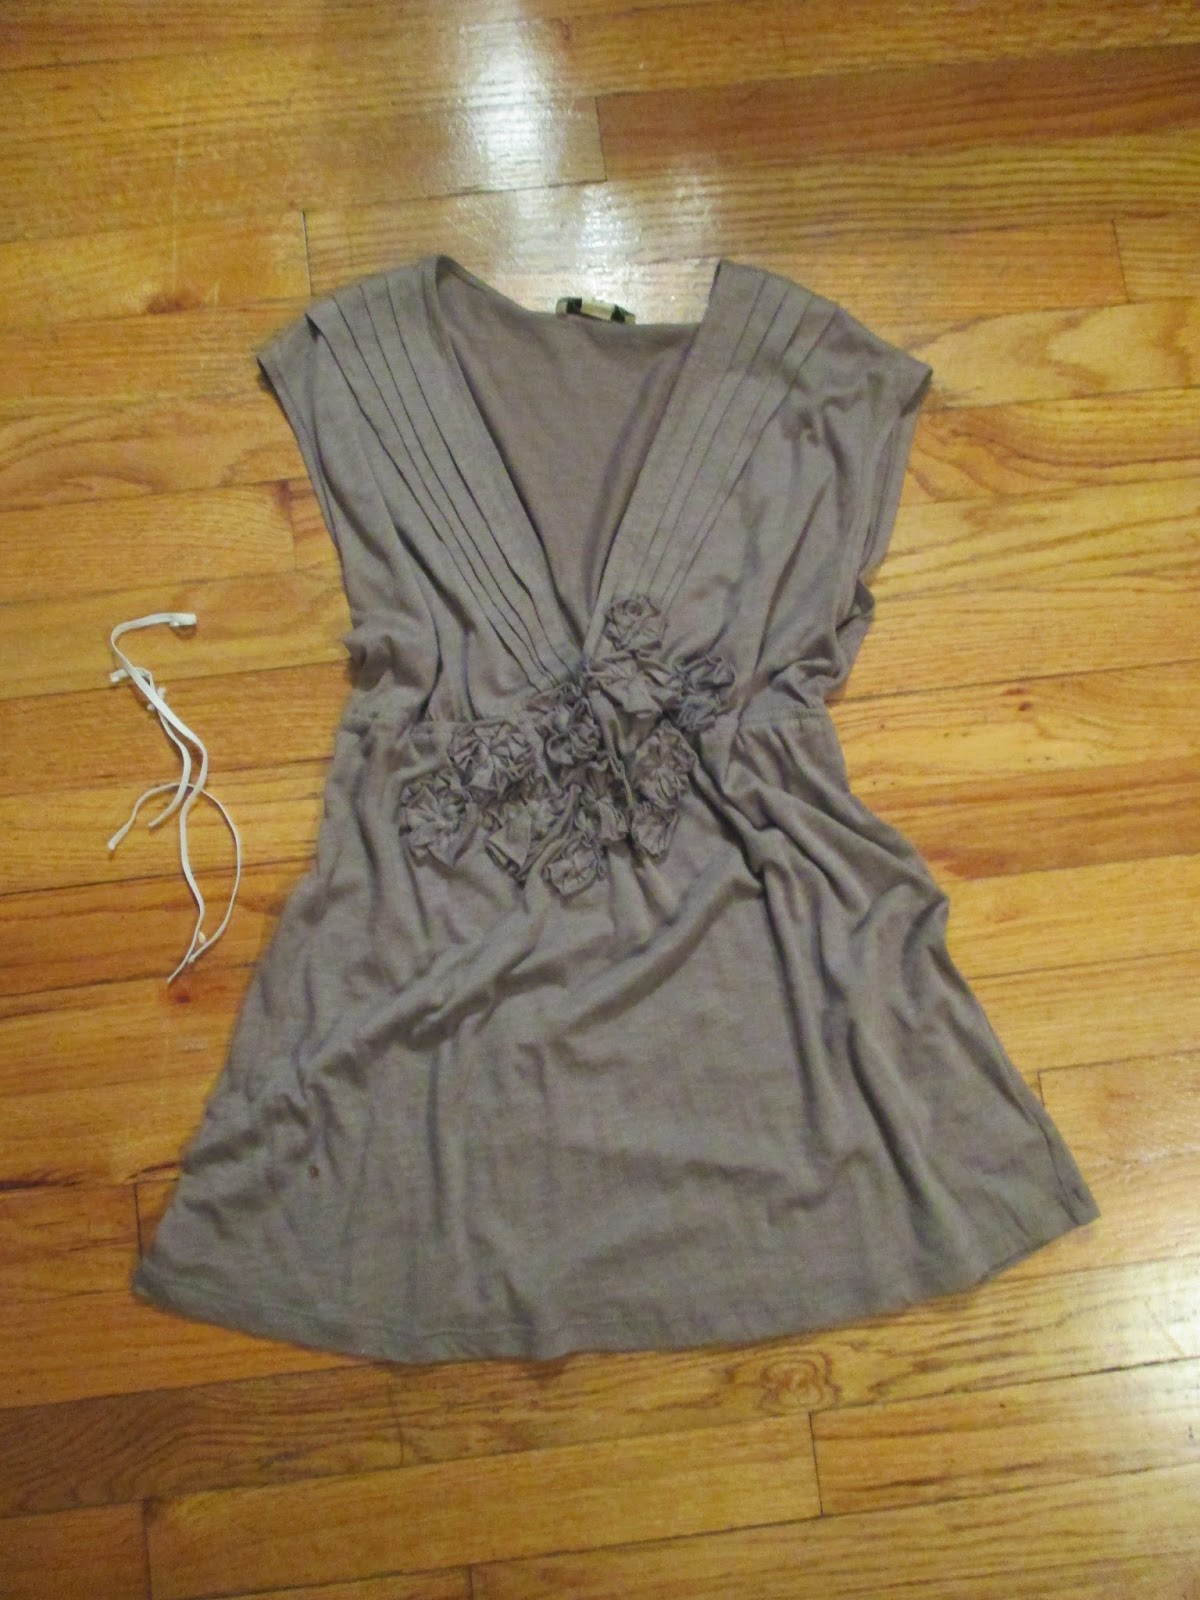
See, there actually was enough fabric to fit around me!

Earlier in Goodwill, I had grabbed several other items to help me out with this sewing project. This was one of them. Uh, after I cut the sleeve off. Again, I'm not so great at remembering to take "before" shots...

I kind of liked this top as is, and I almost went hunting for another lace top to destroy so I wouldn't have to cut up this one. But then I tried it on, and didn't like the lace sleeves AT ALL. They were kind of scratchy and weird and I'm not a big fan of see-through sleeves.
I cut both the sleeves off, leaving about 1/2"-1" of the sleeve on each armhole. I folded it under twice, then folded the whole seam under and stitched it to make a sort of casing for the armholes.

This was what I ended up with! I almost took the beads off, but decided to keep them.
Now back to the brown shirt.

I picked up a second shirt that almost matched. (Since it was just going to be destroyed anyway, I flipped through the shirts until I found one with the color tag of the week - $1.)
I cut out a section at the hem. Here it is with the sleeve from the lace shirt.

I pinned them both to the V-neck. It was harder than it looks to get it straight! Then I trimmed, leaving a generous seam allowance.

I pinned the right side of the lace to the wrong side of the t-shirt and sewed the long edges.

Then I flipped it right side out and pinned it to the V-neck of the shirt. I used two rows of blind hem stitching (by hand) to attach it, and blind stitching across the top to sew the triangle edge together.

This is what I ended up with! Usually with a shirt that is too low, I would layer, but with shirts that are REALLY low, I don't like the way they look...kind of like, "Hello! I am obviously and awkwardly trying to be modest!" I wanted it to look like it was part of the shirt.
I've finally started packing! A friend recommended these Home Depot moving boxes, a suggestion which is nothing short of brilliant. Sure, they will be awkward, bulky, and almost impossible to fit in my friend's car at the airport ;) ...but they are SO much lighter than a suitcase...they only weigh about 3 pounds each and the average suitcase weighs about 10, at least the ones they were selling at Wal-Mart. I'm taking 4 pieces of luggage, so that's 28 extra pounds...more than half of another suitcase! Good, I'll have room to take all these thrift store purchases...lol!

Not only are the boxes super light, they are also CHEAP! They only cost a few dollars each. Admittedly, a roll of shrink wrap (which I will use to secure them) cost about $20, but I think it is well worth it! They will be much easier to store in my room in South Africa than luggage would be, too. Just fold and slip under my bed...or, if I need furniture, I could just tape one or two shut and cover them with a pretty scarf to make a table of sorts. =)
No comments:
Post a Comment